Welcome to the Topvision Security Camera Manual! This guide provides essential instructions for installing, configuring, and using your Topvision security camera system effectively. Discover key features, setup steps, and troubleshooting tips to ensure optimal performance and security for your home or business.
1.1 Overview of the Topvision Security Camera System
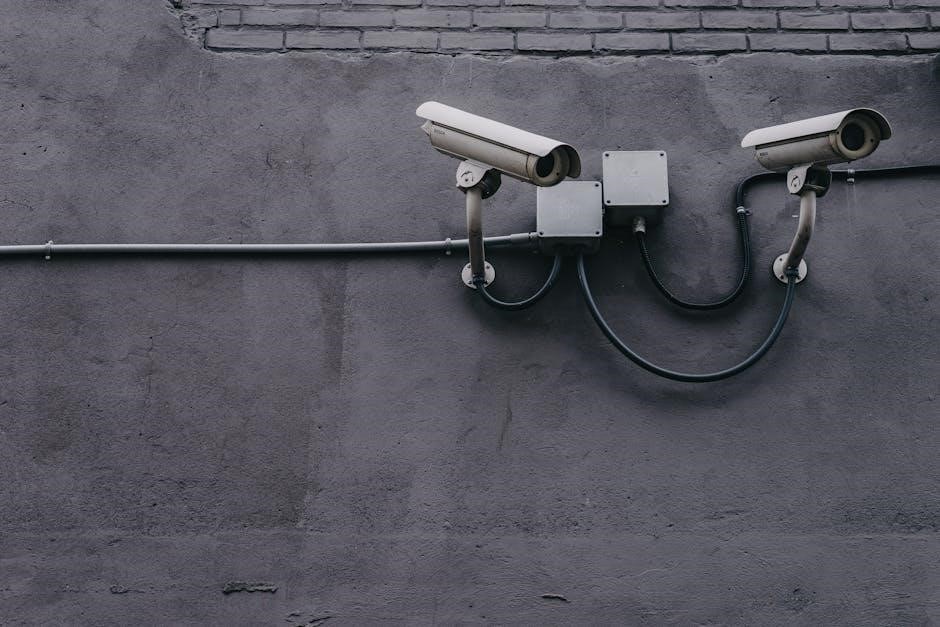
The Topvision Security Camera System is a comprehensive surveillance solution designed for home and business security. It features high-resolution video, night vision, motion detection, and weatherproof durability. With remote access and two-way audio, it offers robust monitoring capabilities. The system includes IP cameras, NVR, and user-friendly software for seamless setup and control. Ideal for indoor and outdoor use, it ensures reliable security with advanced features like ONVIF support and integration with smart home systems, providing peace of mind for users.
1.2 Importance of Reading the Manual
Reading the Topvision Security Camera Manual is crucial for understanding the system’s features, proper installation, and configuration. It provides step-by-step instructions for setup, troubleshooting, and maximizing security. The manual ensures users can utilize all functionalities effectively, preventing potential issues and optimizing performance. Whether you’re a novice or experienced user, this guide is essential for ensuring your camera system operates securely and efficiently, tailored to your specific needs and environment.
1.3 Structure of the Manual
This manual is organized into clear sections to guide you through your Topvision Security Camera system. Starting with an introduction, it progresses through product overviews, installation, configuration, features, usage, troubleshooting, maintenance, and advanced settings. Each section is designed to provide concise and actionable information, ensuring a seamless experience. From unboxing to optimizing advanced features, this structured approach helps users navigate effortlessly, making it easy to find the information they need quickly and efficiently.
Product Overview
The Topvision Security Camera system offers a 4pcs wired setup with 3MP NVR and 1080p cameras, featuring color night vision, IP66 waterproofing, and plug-and-play functionality for easy installation and motion detection.
2.1 Key Features of the Topvision Security Camera
The Topvision Security Camera boasts an impressive array of features, including 3MP high-resolution video, color night vision, and IP66 weatherproofing for outdoor durability. It supports motion detection, two-way audio communication, and remote access via mobile apps. The system is plug-and-play, ensuring easy installation and connectivity. Additional features include advanced recording settings, ONVIF support, and integration with smart home systems. These capabilities ensure reliable surveillance, enhanced security, and seamless monitoring for your property.
2.2 Camera Models and Specifications
The Topvision Security Camera is available in various models, including the X11, 4pcs Wired Security Camera System, and 8CH 3MP NVR. The X11 model features 3MP resolution, color night vision, and IP65 weatherproofing. The 4pcs system includes 1080P cameras with IP66 waterproof ratings. The 8CH NVR supports up to 8 cameras, offering 3MP video recording and HDMI output. Each model is designed for durability and performance, ensuring reliable surveillance for both indoor and outdoor environments.
2.3 Package Contents
Your Topvision Security Camera package includes the camera unit, power adapter, Ethernet cable, mounting bracket, and screws. Additional items may vary by model but often include an NVR (Network Video Recorder) for systems with multiple cameras, HDMI cable for monitor connection, and a quick start guide. Ensure all components are included before installation for seamless setup and functionality.

Installation Guide
Welcome to the installation guide! This section provides a comprehensive overview for setting up your Topvision Security Camera, ensuring ease of use and secure setup.
3.1 Unboxing and Physical Installation
Start by carefully unboxing your Topvision Security Camera and verifying all components. Ensure the camera, mounting hardware, and power adapter are included. Place the camera in your desired location, considering optimal viewing angles. Use the provided screws or adhesive mount for secure installation. Connect the power supply and ensure the camera is stable. For outdoor use, choose a weatherproof location. Refer to the manual for detailed mounting instructions and network setup guidance to complete the physical installation successfully.
3.2 Mounting the Camera
Mounting your Topvision Security Camera is straightforward. Begin by selecting a suitable location with an optimal viewing angle. For wall or ceiling installation, use the included screws and wall anchors. Ensure the surface is level and secure. If using the adhesive mount, clean the area thoroughly before application. Outdoor installations may require additional weatherproofing measures. Adjust the camera’s angle to cover the desired field of view. Tighten all screws firmly to prevent movement. Refer to the manual for specific mounting hardware instructions tailored to your camera model.
3.3 Connecting the Camera to Power
To connect your Topvision Security Camera to a power source, first, locate the power adapter provided with the camera. Plug one end of the adapter into the camera’s “DC In” port, typically found on the back or bottom. Insert the other end into a nearby wall outlet, ensuring it is functional and within reach. For outdoor installations, use an adapter rated for outdoor use to prevent weather-related issues. Avoid using third-party adapters to prevent damage. Check the manual for power requirements and precautions. The camera likely powers on automatically upon connection; verify this or locate the power button if needed. Test the camera by checking for an LED light or viewing the live feed through the app. Consider using a PoE adapter if supported, which provides power through the Ethernet cable. Follow these steps carefully to ensure safe and proper installation.
3.4 Network Configuration
To configure your Topvision Security Camera’s network settings, start by connecting it to your local network. Use an Ethernet cable for a stable wired connection or connect via Wi-Fi for convenience. Open the camera’s web interface or mobile app to access network settings. Ensure the camera is assigned an IP address automatically or enter one manually if required. Pair the camera with your NVR or DVR for seamless integration. Use the Tris Home App or similar software for remote access and advanced configurations. Test connectivity by pinging the camera or checking live feed. Restart the router if issues arise.

Configuration and Setup
This section guides you through initial setup, network connection, and NVR configuration. Follow step-by-step instructions to activate and integrate your camera seamlessly into your security system.
4.1 Initial Setup and Activation
Start by unboxing and physically installing the camera. Power it on and ensure it is connected to your network. Use the provided NVR to pair the camera. Download and install the Tris Home App to activate the device. Create an account or log in if you already have one. Follow in-app instructions to add the camera to your system. Ensure the camera is connected to the NVR for seamless operation. This step sets up your camera for monitoring and recording, ready for further configuration.
4.2 Connecting the Camera to Your Network
To connect your Topvision camera to your network, ensure it is paired with the NVR during the initial setup. Use the Tris Home App to configure WiFi settings or connect via Ethernet for a stable link. The plug-and-play feature simplifies the process, automatically detecting the camera. Verify connectivity by checking the camera’s status in the app. A successful connection enables remote access, motion alerts, and seamless video streaming. Ensure your router is functioning properly for optimal performance.
4.3 Setting Up the NVR (Network Video Recorder)
Setting up the NVR involves connecting it to your network and pairing it with your Topvision cameras. Start by powering on the NVR and accessing its interface via a web browser or the Tris Home App. Use the default login credentials provided in the manual. Once logged in, navigate to the device management section to detect and connect your cameras; Ensure the NVR is updated with the latest firmware and configure recording settings, such as motion detection or continuous recording. Finally, test the setup to ensure all cameras are connected and functioning properly.
4.4 Configuring Motion Detection
Configuring motion detection on your Topvision security camera involves adjusting sensitivity levels and setting up alerts. Access the camera’s settings through the app or web interface. Adjust the motion sensitivity slider to minimize false alerts. Schedule when motion detection should be active and choose notification preferences. Enable alerts for email or app notifications. Customize detection zones to focus on specific areas. Test the setup to ensure accurate detection and adjust settings as needed for optimal performance and reliable security monitoring.
Features of the Topvision Security Camera
Discover the advanced features of the Topvision Security Camera, including high-resolution video, night vision, motion detection, weatherproof design, and two-way audio for enhanced security and monitoring.
5.1 Video Quality and Resolution
The Topvision Security Camera delivers exceptional video quality with 3MP resolution, capturing crystal-clear imagery for enhanced security monitoring. Its 1080p high-definition streaming ensures sharp details, day or night. Equipped with advanced sensors, the camera provides vibrant colors and excellent low-light performance. The X11 model supports widescreen viewing angles, reducing blind spots. Weatherproof design ensures reliability in outdoor conditions. With H.265 video compression, it optimizes storage and bandwidth without compromising quality. This feature-rich camera ensures superior surveillance, offering peace of mind for your property’s safety.
5.2 Night Vision and Low-Light Performance
The Topvision Security Camera excels in low-light conditions, offering superior night vision capabilities. Equipped with infrared LEDs, it provides clear footage even in complete darkness, up to 65 feet. The camera automatically switches to night vision mode when light levels drop, ensuring round-the-clock surveillance. Advanced sensors enhance visibility, reducing glare and improving image clarity. Weatherproof design ensures reliability in outdoor environments. With color night vision and IP66 rating, it delivers robust performance in various lighting conditions, ensuring your property stays secure day and night.
5.3 Motion Detection and Alerts
The Topvision Security Camera features advanced motion detection, sending real-time alerts to your smartphone or email. Customizable sensitivity settings allow you to reduce false notifications. When motion is detected, the camera triggers recording and notifications. Integrated PIR sensors enhance accuracy, minimizing false alarms. Users can set specific alert zones, focusing on critical areas. This feature ensures timely responses to potential threats, providing an additional layer of security for your home or business with reliable and prompt notifications.
5.4 Weatherproofing and Durability
The Topvision Security Camera is designed with IP65 weatherproofing, ensuring durability against dust and water. Built to withstand harsh outdoor conditions, it operates reliably in rain, snow, or extreme temperatures. The camera’s sturdy construction and high-quality materials guarantee long-lasting performance; Whether installed indoors or outdoors, it maintains clear video quality and functionality. This durability ensures your security system remains effective in various environmental challenges, providing peace of mind with its robust and weather-resistant design.
5.5 Two-Way Audio Communication
The Topvision Security Camera features two-way audio communication, enabling real-time conversations between you and whoever is near the camera. This function is ideal for greeting visitors, deterring intruders, or communicating with family members. The built-in microphone and speaker ensure clear sound quality, allowing you to hear and be heard effortlessly. This feature enhances your security system by providing an interactive way to monitor and respond to situations, offering convenience and peace of mind for your home or business.
5.6 Remote Access and Monitoring
Topvision Security Cameras offer remote access and monitoring through the Tris Home App, enabling you to view live footage, receive motion alerts, and manage settings from anywhere. The app supports both iOS and Android devices, ensuring seamless connectivity. With remote monitoring, you can keep an eye on your property in real-time, receive notifications for unusual activity, and interact with visitors or deter intruders using two-way audio. This feature provides unparalleled convenience and peace of mind, allowing you to stay connected to your home or business from any location.

Using the Camera
Learn how to utilize your Topvision Security Camera for live streaming, night vision, motion alerts, and two-way audio communication, ensuring optimal monitoring and control of your space.
6.1 Live Video Streaming
Experience real-time monitoring with the Topvision Security Camera’s live video streaming feature. Access high-quality video feeds directly from your smartphone or PC, ensuring constant surveillance of your premises. The camera’s robust connectivity allows seamless streaming, even in low-light conditions, thanks to its advanced night vision capabilities. With the Topvision app, you can effortlessly switch between cameras, zoom in on details, and adjust settings for an optimized viewing experience, providing peace of mind wherever you are.
6.2 Recording and Playback
The Topvision Security Camera offers reliable recording and playback functionality, ensuring you never miss important moments. With continuous, motion-triggered, or scheduled recording options, you can customize how and when your camera captures footage. Recordings are stored locally or in the cloud, depending on your setup. For playback, easily access and review clips using the Topvision app or NVR, with features like video quality adjustment, timestamp searches, and playback speed controls. This ensures seamless monitoring and evidence retrieval when needed most.
6.3 Managing Camera Settings
Managing your Topvision Security Camera settings is straightforward and intuitive. Adjust video quality, motion sensitivity, and notification preferences to tailor the system to your needs. Access settings via the mobile app or NVR interface, allowing you to customize alert zones, czas zones, and more. Regularly review and update settings to ensure optimal performance and adapt to changing security requirements. This flexibility ensures your camera remains effective in safeguarding your property with minimal effort.
6.4 Using the Mobile App
The Topvision mobile app offers a seamless way to monitor your security camera remotely. Download and install the app to access live video feeds, receive motion alerts, and adjust settings. The intuitive interface allows you to view recordings, manage notifications, and control camera functions from anywhere. Ensure your device is connected to the internet for real-time monitoring. This feature enhances convenience and provides peace of mind, keeping you informed about your property’s security at all times.
Troubleshooting Common Issues
This section provides practical solutions for common problems, such as network connectivity issues, video feed malfunctions, and motion detection failures. Find quick fixes to restore functionality.
7.1 Camera Not Connecting to the Network
If your Topvision camera fails to connect to the network, ensure the Wi-Fi password is correct and the router is functioning properly. Restart the camera and router. Check for firmware updates, as outdated software can cause connectivity issues. Verify network cables are securely connected. If problems persist, reset the camera to factory settings and attempt reconnection. Consult the manual for specific instructions to resolve network-related issues effectively.
7.2 Video Feed Not Displaying
If the video feed is not displaying, first ensure the camera is powered on and connected to the network. Check for obstructions covering the lens and verify that the camera is properly synced with the NVR or app. Restart both the camera and the viewing device. Ensure firmware is up-to-date, as outdated versions may cause display issues. If the problem persists, reset the camera to factory settings and reconfigure it. Refer to the manual for detailed troubleshooting steps to restore the video feed.
7.3 Motion Detection Not Working
If motion detection isn’t functioning, check the settings in the app to ensure it’s enabled. Verify that the camera’s field of view isn’t obstructed and adjust its placement if necessary. Ensure the motion sensitivity is set appropriately. Restart the camera and check for firmware updates. If issues persist, recalibrate the motion detection settings or reset the camera to factory defaults. Consult the manual for detailed steps to resolve this issue and restore motion detection functionality effectively.
7.4 Firmware Update Issues
If you encounter firmware update issues, ensure your camera is connected to a stable internet connection. Restart the camera and retry the update. Check for any pending updates in the app or manual update options via the NVR. If the update fails, verify the firmware version compatibility with your device. Clear the cache or reinstall the app. Contact customer support if the problem persists. Regular updates are crucial for optimal performance and security.

Maintenance and Care
Regularly clean the camera lens and update firmware to ensure optimal performance. Resetting the camera can resolve software issues, and routine checks prevent hardware malfunctions.
8.1 Cleaning the Camera Lens
Cleaning the camera lens is crucial for maintaining clear video quality. Use a soft, dry microfiber cloth to gently wipe away dirt, dust, or smudges. Avoid harsh chemicals or abrasive materials that could scratch the lens. For stubborn smudges, lightly dampen the cloth with distilled water, but ensure it is dry before wiping. Regular cleaning prevents blurry footage and ensures optimal performance. Additionally, inspect the lens for obstructions like spider webs or debris and remove them carefully to maintain unobstructed viewing. This simple maintenance step significantly enhances image clarity and longevity of your camera.
8.2 Updating Firmware
Regular firmware updates are essential for enhancing security, fixing bugs, and improving camera performance. To update your Topvision camera’s firmware, first check for updates in the mobile app or NVR settings. Download the latest version from the official website and follow on-screen instructions to install it. Ensure a stable internet connection during the process to prevent interruptions. Do not power off the camera or disconnect it until the update is complete. Updated firmware ensures compatibility, improves functionality, and strengthens security features. Always verify the update source to avoid unauthorized software. If issues arise, refer to the manual or contact support.
8.3 Resetting the Camera
Resetting your Topvision camera restores it to factory settings, resolving configuration issues and ensuring a fresh start. To reset, locate the small reset button on the camera’s base. Use a pin to press and hold it for 10 seconds until the status light flashes. Release and wait for the camera to reboot. Note that this process will erase all custom settings, so ensure you have backups. For assistance, refer to the manual or contact customer support. Resetting is ideal for troubleshooting or preparing the camera for transfer to a new user. Always follow the manual’s instructions to avoid data loss or device damage during the reset process.
8.4 Regular Maintenance Tips
Regular maintenance ensures your Topvision camera operates efficiently. Clean the lens with a soft cloth to avoid dust or smudges affecting video quality. Check and secure all cable connections to prevent signal loss. Update firmware regularly to access the latest features and security patches. Inspect the camera housing for damage and ensure proper ventilation to prevent overheating. Test motion detection and alerts periodically to confirm functionality. For outdoor models, ensure weatherproofing remains intact. Back up settings before performing updates or resets. Refer to the manual for detailed care instructions to maintain optimal performance and extend the camera’s lifespan. Schedule routine checks to ensure reliability and security.
Advanced Features
Explore advanced capabilities like ONVIF support, smart home integration, and customizable alerts. Enhance functionality with tailored settings and seamless connectivity for a superior security experience.
9.1 ONVIF Support
ONVIF support enhances compatibility with third-party systems, enabling seamless integration with devices from various manufacturers. This standard ensures interoperability, allowing your Topvision camera to work effortlessly with other ONVIF-conpliant devices. It simplifies the setup process, making it easier to incorporate into existing security frameworks. With ONVIF, you gain remote access capabilities, centralized management, and the ability to leverage advanced features like video streaming and device control. This adaptability makes ONVIF a crucial feature for flexible and scalable security solutions, ensuring your system grows with your needs.
9.2 Integration with Smart Home Systems
Seamlessly integrate your Topvision security camera with popular smart home systems like Amazon Alexa or Google Home. This compatibility enhances your home security and convenience, allowing voice command control and synchronized alerts. Use smart hubs or dedicated apps to connect your camera with other devices, creating a unified smart ecosystem. Customize scenes and routines to trigger actions like turning on lights or sending notifications when motion is detected, ensuring a robust and responsive home security solution tailored to your needs.
9.3 Customizing Alerts and Notifications
Easily customize alerts and notifications for your Topvision security camera to suit your preferences. Adjust motion detection sensitivity, set specific alert zones, and enable notifications for critical events. Receive real-time updates via the mobile app, ensuring you stay informed about activity. Customize notification types, such as motion alerts, camera connection status, or low battery warnings. Tailor alerts to reduce false notifications and focus on what matters most, enhancing your security monitoring experience with personalized settings for optimal convenience and peace of mind.
9.4 Advanced Recording Settings
Enhance your surveillance experience with advanced recording settings on your Topvision security camera. Adjust video quality, frame rates, and compression to optimize storage and clarity. Schedule recordings to capture footage during specific times or events. Enable continuous recording or motion-triggered clips. Set overwrite preferences for older footage when storage is full. Customize recording lengths and manage video clips efficiently. These settings ensure tailored surveillance, providing reliable evidence and minimizing storage usage while maintaining high-quality video capture for your security needs.
Security and Privacy
Protect your Topvision camera from unauthorized access with strong passwords and encryption. Ensure data privacy by securing recordings and enabling regular firmware updates for enhanced safety and reliability.
10.1 Securing Your Camera from Unauthorized Access
To protect your Topvision camera, use strong, unique passwords and enable two-factor authentication. Regularly update firmware to patch vulnerabilities. Ensure the camera is connected to a secure, encrypted Wi-Fi network. Limit access to trusted devices and avoid using default passwords. Enable encryption for data transmission and storage. Disable unnecessary features and ports. Use a VPN if accessing the camera remotely. Change passwords periodically and monitor for unauthorized login attempts. This ensures your camera remains secure and prevents potential breaches.
10.2 Data Privacy and Protection
Your Topvision camera ensures data privacy through robust encryption and secure transmission protocols. All recorded footage and settings are stored locally or on encrypted cloud servers. Access is restricted to authorized users, and data sharing is controlled by password-protected permissions. Regular firmware updates enhance security, while compliance with GDPR and CCPA standards safeguards personal information. Data retention policies allow you to manage how long recordings are stored. Always verify the authenticity of software updates to prevent unauthorized data breaches and ensure your privacy remains intact.
10.3 Password Management
Secure your Topvision camera system by creating strong, unique passwords for all user accounts. Avoid using default passwords and update them regularly. Enable two-factor authentication for an additional layer of security. Use a password manager to securely store and manage complex passwords. Regularly review and update access credentials to ensure only authorized users can access the system. Features like password recovery and account lockout after multiple failed attempts further enhance protection against unauthorized access.